Tankless water heaters, like any other household device, are prone to reduced performance over time due to a variety of factors. We typically find that the quality of the incoming water (i.e., the water you receive from the city if you’re connected to a municipal system or the water you receive from a well or rainwater if you’re in a rural environment) has a lot to do with how quickly you experience flow issues. If your tankless water heater isn’t giving you the water flow rate it used to when you installed it, you might need to flush the system. If you’re short on time or are afraid of tampering with electricity, you can hire a plumber, but it’s also more than possible to perform a simple tankless water heater flush on your own. We’ll go into how to do this in the section below. However, before describing the flushing process, let’s have a quick review of why flash water heaters tend to slow down to begin with.
Why do tankless water heaters slow down over time?

It’s important to remember that tankless water heaters don’t stop working without reason (well, the good models, anyway); if your water supply starts slowing down over time, it’s almost certainly going to be due to a poor water supply. Because instantaneous water heaters pump water at high pressures through small openings, you need decent-to high-quality water; naturally, the cleaner your water supply, the less likely you’ll be to have scaling (calcium and magnesium deposits) or microscopic sediment such as gravel, rocks, sand, or other particulates clog the apertures within your on-demand heater.
As a result, you’ll want to install a hard water softener upstream of your continuous water heater (i.e., in the water line that goes *to* your water heater) if you don’t already have one installed. A threshold we frequently recommend for installation is a local water hardness of 7 grains per gallon (gpg) or more, which translates to a ppm of 120 parts per million (ppm) or milligrams per liter (mg/l) or more. We have a local water hardness of 25(!) which is why we invested in a high quality water softener for our home and make similar recommendations for anyone in our area (the Chicago suburbs).
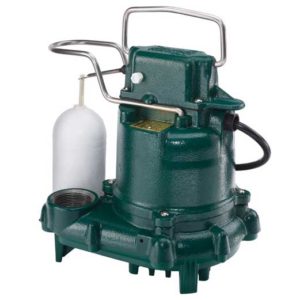
Now that we’ve covered why you’re likely experiencing a water slowdown in your tankless water heater, here’s how to fix it. You’ll probably need to do this on an interval between ever 6 months and every 2 years. To flush your heater you’ll need a small submersible sump pump (e.g., the Zoeller M53 or Wayne CDU980E), a 3-5 gallon bucket, a pair of hoses, and 3 gallons of vinegar (we prefer white vinegar).
Shut off all relevant power and fuel supplies
Before doing anything involving electricity and water, it’s essential to turn off both. That means turning off your water at the inlet and outlet valves for starters. If you’ve got a gas-powered tankless heater, you’ll also want to turn off your gas via a gas valve and either unplug the electrical power source or simply go to the circuit breaker the heater is connected to and turn off the relevant circuits. If you have an electric tankless heater, you’ll either want to turn off your 240-volt circuit breaker or find the disconnect switch on your electric sub panel and turn it off there. Finally, you’ll also want to let out the water pressure by pulling out the tab or switch in your unit’s pressure relief valve.
Remove the outer cover of the tankless water heater

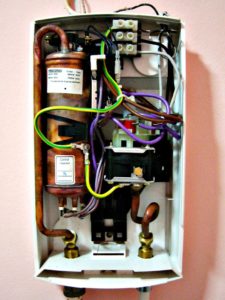
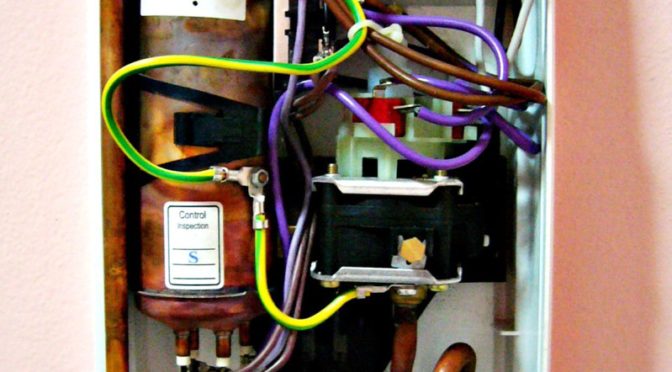
Depending on which kind of tankless water heater you have, the cover will disconnect somewhat differently, but there will typically be snaps (if you’re lucky) or a set of screws around the perimeter. You might need to wiggle the lid back and forth or lift it upward, sideways, or even slide it downward and out to disconnect it. Each cover is different, and reviewing your manual will be the quickest way to figure out how to open it (because you’ll need to open it from time to time to change the inline filter anyway).
Be on the lookout for proprietary or Torx-type screws, as these may require more specialized tools to open. Remove the cover carefully to avoid disconnecting any wires that may be connected to it internally and be sure to keep track of all relevant screws.
Fill the bucket with white vinegar and immerse the sump pump
First fill the bucket with 2 gallons of white vinegar; the mild acidity in the vinegar will help clean your lines out without damaging them or leaving residue. You’ll want to connect one hose to the heater inlet on one end and the sump pump on the other. The second hose will run from the water heater’s pressure-relief valve on one end to your vinegar bucket. Turn on or plug in your sump pump and let it run your vinegar infusion through your heater; we typically have it run for about 15 minutes, but if you’ve got a lot of scaling (the calcium and mineral deposits that make up hard water), you can let it run for up to 30 minutes.
Turn off the pump and clean the inline filter
Once enough time has run by, you’ll want to turn off your sump pump. Disconnect the housing that keeps the inline (screen) filter for your tankless water heater. The precise location will vary significantly from one water heater to the next, but it will typically be located just beside the water inlet, since this is the first line of defense of the water heater against the sediment we’re trying to flush out. Remove the screen filter carefully and clean it thoroughly with clean running water. If you can replace it, that’s even better, but if you can’t, you can put the same one back in. Keep in mind that a brand new filter will do a much better job at keeping your water flow healthy than a used and dirty one. At the same time, don’t get tempted to leave it out if you can’t replace it; a bad filter is better than no filter at all, and many tankless water heaters won’t run without one installed.
Remove the pump from the bucket
With a bit of luck, the next time you run water heated by your tankless heater, you should no longer experience any disruption in the water flow rate. However, it’s important to remember that there are many different kinds of tankless heaters out there, and the steps we outlined above aren’t going to be a cure-all for all of them. Furthermore, if the steps above do work for your particular setup, keep in mind that you will likely need to repeat them every 6 months to 2 years, depending on how frequently you experience a drop in water flow.
You’ll wan to err on the side of caution and perform the procedure more frequently over less, as if you put it off for too long, you can reach a point where your tankless heater’s piping becomes too clogged to clean through a basic approach like this. At that point, you might need to call in a professional. The biggest preventative tool you can install to reduce the rate at which you need to flush your heater and the risk of having a highly clogged one is to make sure you’re using a good water softener upstream, and to keep it stocked with the salt it needs to work.
If you find our work at PumpThatSump helpful, you can support our relentless reviewing of every sump pump on the market by shopping via our Amazon link for whatever you need to make your house a home. Despite being self-employed, we promise not to spend it all on health insurance.
